


Whenever we connect a drive whether new or the earlier connected, Windows assign it a unique Drive Letter randomly. Managing these letters is possible in Windows through diskmgmt.msc but only for the connected drives.

Then what if your drive is not connected to the system? Also for those who want a specific drive letter to their specific drive always, this can be done using the tool called DriveLetterView.
DriveLetterView is a simple utility that allows you to view the list of all drive letter assignments in your system, including local drives, remote network drives, CD/DVD drives, and USB drives - even if they are not currently plugged. It also allows you to easily change a drive letter of USB devices and remote network shares, as well as to delete a drive letter of USB device that is not plugged.
The tool also allows you to save the list as a txt, csv, html or xml file. This utility works on every version of Windows, starting from Windows 2000 and up to Windows 7/2008. Both 32-bit and x64 systems are supported.
In order to change/remove drive letters on Windows 7/2008/Vista, you have to right-click on DriveLetterView.exe and choose ‘Run As Administrator‘. If you run it without admin rights, DriveLetterView can display the list of all drives, but you won’t be able to change/remove a drive letter.
Download DriveLetterView
Most of the new systems especially the laptops come with the dedicated button for ejecting or inserting the CD tray but in case you don’t have one, you can still make use the feature. One of our readers also wanted to have the CD drive eject utility as mentioned below.

We have written about the tool once which can be used somewhat for this purpose, but here is a free and simple tool that will enable you to both eject and insert the tray with just one click.
Emsa CD Tray Pal is a handy utility that acts as a CD-ROM Drive control menu. It runs in the system tray and makes opening/closing CD door easier than ever, even on multiple CD-ROM drives.
Features
- Autorun at system startup
- Runs as system tray icon
- Capable of handling multipe CD-ROM Drives
- OpenCD, CloseCD, GetCD, OpenAll, CloseAll functions
- Handy systray right-click menu
- Provides CD media informaion: Volume name, Size, Serial Number
- Configurable GetCD time interval
- Capable of showing either a single systray icon, or one icon per drive
- Action on system shutdown: Close All / Open All CD doors
- Assignable, system wide Hotkeys per each drive and function
- Tray icon(s) changing color based on whether valid media is inside the drive etc.
To assign a hotkey, first select the CD-ROM drive you want to edit from the left hand list on the Hotkeys tab. Then, click on the textbox on the right accordingly with the function you want to assign the hotkey to. Press a keyboard combination that you intend to use as hotkey (for example CTRL + ALT +F5 ). You can do the same for all three hotkeys assigned to the currently selected disk. Once you are satisfied, press the Save Hotkeys button to save them.
Download Emsa CD Tray Pal
If you are a Firefox fan and like working on it but are irritated as your Firefox is running slow then here is a simple utility that can improve your Firefox browser’s performance and reduce the reaction time.

The utility is called as Firefox Booster which is a small and simple app designed to accelerate and speed up the Firefox browser. What this utility does is, it configures your Firefox browser according to the internet speed you have. It changes the profile of the browser according to the internet type you have.
The tool displays the internet speed as image of cars, choose your type and this tool will automatically make your Firefox adapt to the internet speed you have. In short this is a nice way to optimize your browser.
Download Firefox Booster
Internet is not a very safe place anymore, you need to keep very alert and aware of the details behind the emails that you get. Two days back I got an email from “security@sbi.com” email id. It did looks like legitimate email from the State Bank Of India at the first looks, but it was a fake phishing email from some cyber criminal. In this post I will show you how I identified that it was a phishing email.

There are a few points which I share with you here to identify if an email is Phishing attack email or a genuine email:
1. Check the email id of the Sender :
Most of the times, phishing emails will be from some domain which is not a genuine bank or organization email id. For example, in the above email, the senders id is security@sbi.com, whereas the official domain name of State Bank of India (SBI) is “www.statebankofindia.com” and not “www.sbi.com” . If you find the sender’s email id suspicions, this email might be phishing email.
2. Check the recipient email id:
If recipient email id is not visible or the email id is not your id registered with bank or organization, there are high chances that the email is a phishing email.
3. Information Requested in the Email:
Banks never ask you to provide your personal account details via email. Especially information like your login id and password of security questions. If the email is asking for any of these things, there are very high chances that the email is a phishing email.
4. Presence Of A Form or Link In Email:
Most of the phishing emails have links to login pages which look just like the official page of the bank or have forms which look like the login forms on the official website. Never click these links to open enter your bank details. If anyhow you want to access your bank or other details, type the URL carefully yourself instead of clicking the link in the email.
In the email I received, there was an HTML page attached as shown below, the page contained a malicious link with a fake form. The page looked exactly the same like SBI login page.

Attachment file containing phishing link

Fake SBI Login Page
To identify if a page is fake or genuine, see its URL carefully and click on the URL information box. It will show you certificate information etc. Also the browser will identify the https page, the genuine login pages usually start with https URLs while the fake ones will start with http URL.
Below is the genuine SBI login page which I opened manually by typing the URL of onlinesbi.com to compare it with the fake website link I got via email. It looks exactly the same, but the browser shows it green and safe, URL starts with https, also the URL has a valid digital security certificate and identification.

Genuine SBI Login Page
5. Presence of an Attachment File:
Usually banks send out only PDF or Excel files as attachments to their customers for the information purpose only. Many of these files are password protected to avoid misuse of Information. If you receive an HTML file, or HTM file, or MHT File or any other file containing links, the file might contain phishing links, spywares, viruses etc.. Never open such files until they are from a legitimate sender and to be sure, first scan the file with your anti-virus tool and then only open the file.
When I analyzed the file sent to me in this fake phishing email, I opened the HTML file and check the source, it contained the phishing URL which is “http://www.jonathangosselin.

6. Warning Messages and Security Alerts
If you get a warning message or alert via email regarding any of your accounts or online profiles, its always recommended that you make a phone call to the bank or concerned organization and check with them if the alert is real or a phishing attack. If at all it is a real alert, then its recommended that you open the website by typing the URL and then performing the required action.
With all these cyber crimes and threats all around the Internet, we recommend you to stay safe and use some effective anti-virus tool. Also, be alert when you download any email attachment or click any link you got via instant messaging or email.
Thanks To TroubleFixers
Generally when I come up with a news on this site then it is generally a security related issue. Even today I am going to discuss the same. We try our best to cover all the scams in Facebook and that is the reason we have already shared lot regarding it from time to time. These new scams on Facebook will again take you to a survey page which may even charge additional cost on your mobiles. In this post I will be telling about these new scams on Facebook and how these can trap you in.

All of these scams have one thing in common and that is the reason we have tried to cover them in a single post, they all are affiliated to FarmVilla (one of the popular games on Facebook). All of these scams will lure you by offering new rewards of that game and many of the users who love to play this game will tend to click those links in order to get that reward. But then it will end up to a survey page and posting wall posts on your wall and the wall of your fiends.
One of the scam links was stating that ‘[someone] claimed a free FarmVilla Fiordland Penguin after cracking open a Candy Cane Egg!’ after you click this link it will ask you a permission to access your wall and then it will post a wall post advertising their link on your wall and then it will ask you to fill up the survey form and they will claim that once you complete this survey you will be able to get that reward. If that survey is paid then they may deduct heavy amount from you mobile. So I will suggest you to stay away from all these scams which are running these days for FarmVilla.
Some of the scams which have been seen recently are like Icelandic Horse and Wolf Club. So, just stay away from them and if you happen to see them on your friends wall then please suggest them to remove it. Let us see that when Facebook will put up their hands to get rid of these spams.
We will keep you updated with any new changes found related to this news topic or any other topic which is related to it and anyhow if you get to know anything related to the news topics mentioned above then please do not hesitate to share it with us, just put it down in the comments section and if we found it genuine then we will be sharing that piece of information with all the other readers on your behalf, so keep searching something useful and then let us know about it. Till then keep reading, take care of yourself and have a nice day!!!
For each game having an option of saving the game while playing, there are some save files that are created. These files and folders contain the game save files which are nothing but your game saves. In case you are thinking to change to a new drive or format your system then this post will help you backup these easily.

To backup and preserve your game saves you need not backup manually. With the help of this tool called SaveGameBackup, you can easily backup your games save files and restore them after installing a new copy of it. SaveGameBackup is your savegame solution. Quickly and easily backup your games’ save files for easy storage and fast recovery.
Features:
• Quickly backup your save games and settings. Supports 548 games and 10 applications!
• Built-in ignore list for games you do not want to back up (the checkboxes). Your preferences are saved between sessions.
• Use it with Windows’ Task Scheduler for complete automation.
• Easy backup restoration.
• Easy to use interface.
The tool is free to use, coded in Visual Basic and is small in size. The freeware currently works on Windows both 32 and 64 bit.
Download SaveGameBackup
Send To option is very useful option to send an item instantly from one location to another like a removable drive, Bluetooth or just a folder. It would have been great if we could have customized this option by ourselves and also added more to it.

With the help of a tool called Send To Toys, we can do much more functions than just send. Send To Toys is an enhancement of the Send To system menu.
Send To Toys Control Panel Applet allows you to manage the Send To system menu content, and configure the various Send To Toys settings. Whether it is Quick Launch, Recycle Bin or some other location, just use this tool.
The tool is a freeware and can also be used to add customized options to the context menu send to option.
Download Send To Toys
Orkut account Hacked / taken over ( and deleted after being hacked by someone.)
General methods of hacking Orkut Account :-
1. Phishing using fake page.
2. Using Keyloggers / remote key loggers.
3. Brute force attack.
4. Using Java Scripts.
5. Using greasemonkey scripts.
6. By cookie stealing method.
7. Other methods.
Explanation of each method is beyond the level and i dont wanna go in details.
Follow these steps:
1. Try to reset your password – Go Here or Here
2. If not able to do so then fill this form providing as much correct details as you can. ( the correctness of info provided will determine weather you will get back your a/c or not so give your best guess if you dont remember something.Contact Orkut for password reset.
3. If your Orkut Account has been deleted after being hacked. do fill this form (Click here ) immediately.
You will get password reset link through email. Do change your password and login to your Account as soon as you can.
4. Always remember these points:

- Donot ever login to any site rather than www.orkut.com
- Donot ever run any javascripts while logged into your orkut account, Never use any flooder in your account
- Donot ever share your password with anyone else and keep changing your password regularly.
- Donot ever click suspicious link while logged into Orkut Account. if you are curious you can copy the link and check them in other browser after cleaning it’s browser’s cookie and cache.
- Donot ever install any suspicious script on greasemoneky and always disable greasemoneky before logging in to orkut.
- Do your mobile verification also, so that you can get back your account if hacker doesn’t change the mobile number there.( Verify mobile here )
While Windows Vista and 7 have this special feature of Alt + Tab that is seeing a preview of the Windows while switching, Windows XP lacks it. With the help of a tool mentioned here, users can get even better preview for not only XP but also for Vista and Win 7.

The tool is called VistaSwitcher which is an elegant and powerful task management utility for Windows OS. Once installed, it replaces the default Windows Alt-Tab dialog with a nice box that shows a list of all running tasks, with their names and preview snapshots, and enables the user to take actions on them using the mouse and keyboard shortcuts.
As show in the snapshot above, users can not only see the list of all the applications running but also a nice and big preview of the application which adds more appeal to the users while working on the system. Moreover the tool is free to use.
The main advantage of VistaSwitcher is a brand new Alt-Tab switching window. Unlike to the stadard Alt-Tab, VistaSwitcher shows a full-sized preview of each task window and easy-to-read relevant lists of tasks running, all shown clearly with titled icons so you can find the one you need within seconds.
Download VistaSwitcher
Deleting old and unused files from your PC is very tedious and time consuming process. All these old and junk files not only acquire the space of your hard drive but even effect the performance of your computer. So if you don’t want to waste your time and effort in searching for old files in your PC, even if you know locations, then today we will be telling you about a tool named Delete Files By Date using which you can delete all your old files.
It is the best solution to delete files that are older than a certain date even if you don’t know location of those files. This tool make it easy to find old unused files that are no longer needed and delete then in just one click. All you need to give is date and size and this tool will then automatically scan your complete computer with all those files which were created before that date.

Now in the main Window, you will see two options. First is Start with Windows. Tick mark on this option if you want this tool to run automatically at the time of booting of your computer. Now the next option is Protect with Password. This is the wonderful feature of this tool that you can password protect it. All you need to do is to place tick on this option and then put a desired password in both the boxes, and then click on Apply.

So next time when you will open this tool, you will prompted to enter password without which you won’t be able to run this tool.

These two are features of settings. Now the another option available on the main window of this tool is Delete Files. Click on this option to delete the old files from your system. You will see following option when you click it.

So the three main option available are Search for Files, Date and Size. In Search for files you can click on All files if you want to scan for all files extension or you can even make your search more specific by giving a particular extension and search all those files which are of those kinds. Next option is Date. Here you can search files by the ‘created date’, ‘modified date’ or ‘accessed date’. In next box you can will different options like less than, between, greater than etc. You can customize all this option to make your search more specific with date and time.

Now next option is size. This option will allow you to specify your search with desired size. Once you done with all the settings, all you need to do is to click on Add button and then add a folder or complete disk. Then this tool will start processing.

When the search get finished, it will show the results in the Window and from there you can choose all those files which you want to delete and then simply click on Delete button to remove all those unused files rom your PC.

The size of this tool is 4.05 Mb and still it will not take much time to get installed and as usual it will create a desktop shortcut which can be used to access this freeware. This tool is compatible with all the versions of Windows and has been tested successfully on Windows 7 Ultimate-32 bit edition.
Source:technixupdate
Download Delete Files By Date
If you are working on say 10 applications at the moment and after the work you need to close them all then what should you do? Click Close button on each of them? Just use this tool that can close all the applications and windows running at the moment at once.

The tool I am referring about is called CloseAll that can terminate all the currently opened windows and applications at once. This program lets you close all running applications with just a single click. It doesn’t use system resources because it only flashes a ‘close’ signal to all open applications on the desktop and then ceases.
The tool is best to use when you want to shut down your computer. Just create a shortcut to the tool in the Start Menu, Quick Launch, Windows 7 Taskbar or elsewhere and double click to execute it. The tool requires no installation and hence can be run directly from the USB drive too.
For detailed information and its usage, visit the link below.
Download CloseAll
If you miss the Timer feature the most in Windows then third party timer tools should suit your needs. There are lot of timers available for Windows but they are not that simple to use as this tool called SnapTimer.

SnapTimer is a free Windows Countdown timer that you can run to time your activities. Along with being free, it is also one of the simpler timer tools available for Windows. Just run this tool and type in any time you want to count, SnapTimer should work for you.
SnapTimer is also light, portable and require no installation, thus can be run directly from the USB drive as well. Find all the features below:
• Simple, clean interface
• Displays time in the taskbar, as a hint in the tray and even in the right-click menu of the tray icon.
• Tray icons indicate the mode of the timer (running, paused, completed)
• Multiple alert types - message box, tray icon popup, audio file and any application
• Stopwatch mode when you set minutes to 0
• Play an optional ticking sound while the timer is running
• Countdown can be paused and restarted, or reset
• Portable (runs from your USB flash drive)
• Can stay on top of other windows
• No install required
• Low RAM usage
• Can automatically start counting down immediately
• Includes over 20 loop-friendly alarm sounds (Meaning they’ll play over and over until you reset the timer)
• Can automatically restart timer when it finishes
• Lets you quickly and easily change the countdown time with mouse or keyboard shortcuts
• Automatically saves all settings (optional)
• Accepts time as command line argument, so you can create preset timer shortcuts or run the timer from a launcher (FARR, Launchy).
• Can be minimized to tray
• Supports multiple instances (You should disable always on top and probably autosave settings as well)
• Can be docked to a corner, in the center or restore the last screen location
• No internet access required
• Doesn’t write to your registry
• No ads, spyware or malware
• 100% free
Being a freeware, it can be used for all the purposes without any limitations. SnapTimer supports all the versions of Windows on both 32 and 64 bit systems.
Download SnapTimer
Social networking sites have probably become the most popular way to stay connected with your friends. Seeing so much popularity, developers of these websites always keep on trying something innovative and new feature to attract people towards their site. So today we are going to tell you about a new and innovative feature i.e Video Chat in Orkut.
All social networking sites have option to chat with your friends through text but recently a small plugin is developed for Orkut which will enable you to do voice chat with your friends. This plugin will integrate with your Orkut and you will just require a Web Camera and a Headphone to video chat with your Orkut Buddies.
This is really an exciting feature and am sure you all will love this feature. So if you want your Orkut account to enabled with this feature, you can read my tutorial below. Before starting my tutorial let me tell you best thing about this plugin that it not only works for Windows XP or later only, but even works for Intel Mac OS X 10.4 or later and Linux. Hence if your OS falls under above category, then you can start with the tutorial.
First you will need to download this plugin which is available at www.google.com/chat/video. Then you will need to click on Downloading link available on this webpage.

Once you click on this link, it will direct you to another page and your downloading will start in some moment. It will take less than a minute to download this tool.

Once it finishes download, this plugin will automatically get installed in your system. This process will again require a time duration of less than a minute.

Now once it finished installing, it will notify you to restart your browser. You have an option to Restart Browser Later but it is advisable to restart it now but still you can save your pages in current browser before restarting it as restart will close all your opened pages.

After this, this plugin will get successfully installed in your system. The best part of this plugin is that it works with all the Web Browsers. Now open your Orkut account and at the home page of your account only you will find new options being integrated in your chat settings. So now all you need to do is customize settings for video chat and then you can instantly start video chat with your online buddies.

This setting will get located in the more option available under your orkut chat box. You can see following snapshot to see where this option is available.

Now once you configured all the settings, click on any of your friend from your online friends and tell him to install this plugin and get ready with web cam. Once he also configure his system, you both can start video chat. All you need to do is to click on a icon available on your chat window and then your video chat will start as soon he/she accepts your invitation.

Once you start video chat, you can pop up chat window and even can resize the size of video interface on your screen. In simple click you can even switch to full screen mode and if you are not using it in full screen, then you will find it easy to move video chat window to any part of window. This tool enable you to experience the high quality video chat with your friends. You can still have a look at video below, to see more about its functionality.
Today we will be reviewing a freeware which can be used to protect you system from anti-viruses and other malware which may harm your system while surfing on internet. We have reviewed many such tools but this one is light and provides better security on systems and it is called as Time Freeze Free.
This tool will tell you about the general configuration of your system and then it also provides a facility to protect a certain folder or a certain location on your system. I hope that you will like this tool as it acts as an antivirus, so it will also save your anti-virus application bills.

You can see in the snapshot of the application window that this tool will be used to protect your system. After you install this tool make sure that you restart your system else it will not work. You can see a black button in the bottom of the application window, which should be switched to ON in order to start this tool. In this snapshot you can see that in the system description all the information related to C drive and the other hardware information like the amount of RAM which has been installed on your system and then the amount of space which has been occupied and the one which is vacant, is available as it is the drive where the OS is installed on it.
There is another tab in the application window, which is named as Folder protection. In this tab you can specify a separate folder which should be checked regularly, for any virus or any other malware. Now, I would recommend you to keep your download folder under surveillance of this tool. Once you install this tool, you can access it from the desktop shortcut icon or with the help of the icon available on the tray.
The size of this tool is around 2.2 Mb and I should say that this size is comparatively smaller as compared to the other freeware which are used to protect your system from viruses and malware. After downloading this you will be required to get a key which will be available from the link mentioned below. This tool is expected to be compatible with all the versions of Windows as it has been checked with Windows 7 64-bit Ultimate edition.
Source :Technixupdate
The site, where you can find the key for this product.
Download Time Freeze Free
If you have used Windows Home Server, you know how much everybody wants it to be turned on all the time so they can access their media files, make a backup etc. Though servers are built for 100% uptime but not everybody is at home all the time and there are situations at which keeping it turned off makes more sense. Smart Power application is a power management utility which can be a boon to this situation.
This application can hibernate / shutdown or make it sleep when you haven’t said it so. For example if none of the users are accessing the shared files connected or you are not de-fragmenting your home server. This application gets installed in your computer as a service which keeps on checking for the rules.

As this service targets the state i.e. Hibernate / Sleep and Shutdown, make sure you create the plans wisely. You can configure rules based on :
Schedules :
Your home server can be scheduled for each day individually. When to start and when to end. So if most of your members are at home from 6 PM evening you can wake it up from sleep at that moment.

Connectivity :
You can check if a computer is connected to your Windows Home Sever either by IP address or by host name. Using a host name makes more sense unless you have configured for static IP while connecting them to the router.
Network activity :
It is possible that your Home Server is connected to the router using Wi-Fi or by Lan. Smart power lets you configure to create rules based on the network activity to with which the server is connected. So if you router is connected to Internet directly, you can create rules to watch the activity in terms of throughput.
For example if you are downloading a windows update on your home server the activity will be high and you don’t want the machine to go down.

CPU and Processes :
When defragging your home server the CPU usage is high or even when you are encoding a video. Moreover there are some processes which should not be stopped suddenly. Both of this can be configured to keep your machine from getting into a different state.
Download Smart Power
In 21st century, Internet is accessed by the people of all ages for their respective purposes either for education, work, entertainment and many more. You can get knowledge about everything which is existing or in research. But, now-a-days this option has become a reason of concern for the parents and teachers regarding their young children.
Parents can’t always keep an eye on their child’s internet activities so its better to use some precautions and safety measures to ensure a safe experience of internet. But most of the parents do not know how to do that.
In solution to this, Google has come up with some tools and advices for parents by which they can protect and educate their young children on using the internet.
Google has provided some tools and controls that help you manage your online experience.
There is an option of ‘Google Safe Search’ which is designed to remove sites that contains sexually explicit content from our search results. By default, Moderate Safe Search is ON but for more precautions you can select Strict Safe Search.
You can do this by going in the option of ‘Search Settings’ at the top-right of Google homepage and then in the option ‘SafeSearch Filtering’.

After locking your search option, your Google search will appear with colored balls which will ensure you that your kids searches are safe even from a distance.

1. Sexually explicit and violent material
2. Meeting strangers online
3. Sharing too much personal information
4. Cyber bullying
5. Exposure to vulgar language
6. Sites promoting inappropriate behaviours such as eating disorders and drug use
7. Malware
You can read the advices of these organisations on these topics on the given link:
Advice on Safety Issues
You can also report inappropriate content on YouTube, Buzz, Blogger and Picasa Web Albums.
For example, if you find any video on YouTube inappropriate then, you can report it by just clicking ‘Flag’ below the link which will show a list of reason why you want to report that video. Just select the appropriate one and click ‘Flag this video’.
The video will then be reviewed by a team and if found inappropriate, will be deleted.

Reporting Inappropriate Content
Source:Troublefixers
You can also watch videos of parents view on this topic on Thoughts From Parents.
At home, we usually have a single computer or laptop which is shared by all the family members so it becomes difficult to save our personal data. Also in offices, our colleagues’ evil eyes are always searching for important data in our computer. So, to keep our data safe there are two options either hiding our folder using hide icons application or using a freeware called Secure Folder which will help us password secure our folders. Secure Folder is a tiny application for commercial as well as personal use which will lock/unlock folders and drive with password. It is supported by windows 7, vista and xp. It is downloaded as an exe file so there is no need of installation. When you will run the exe file it will ask you to enter the password to login. You have to remember this password because you can later unlock your folders using this password only.  After login, you can see the main window of the application which is user-friendly with few options so that you can make your folder secure in just few clicks.
  For making your folder safe, you just have to click the option ‘Add’ and add your folder and the folder is locked. It doesn’t provide the option of drag & drop.
  Now, when you want to open that folder, you have to right-click and click ‘[Lock/unlock] with secure folder’. After that, it will ask you for the password which you have entered at the time of login to unlock. NOTE: Now, the folder will get unlocked so you have to again lock it to make it safe by going to the application.
  You can also unlock the folder in the main window by marking the desired folder and using the option ‘Unlock’.
  It also provide you the option of changing the password by going in the option ‘File’ and then ‘Change Password’ which will show you the this window where you can set the new password.
  So, it is a smart utility for hiding our personal information from the people whom we don’t want to see it.
Source:Troublefixers
Download Secure Folder 1.0.0.0
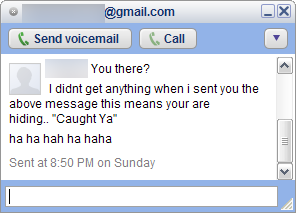
We always have many ways to find out if user is invisible or offline on yahoo. But finding if the user is offline on Google Talk is tough before this.
Follow the steps and you will end up finding the actual status of the user.
- Open The Chat window of the user, you want to check the status.
- Click on option and click on “Go Off the Record”

- Now message user
- If you get something in red that the user is offline and can’t receive messages that means the user is offline

- If you didn’t get any message in red that means user is online in invisible mode..:)
If you want that the explicit websites which are available in plenty over internet, doesn’t capture the young fantasy of your child, then you can use a toll called Parental Control Bar to block all explicit sites.
Parental Control Bar is a very simple tool which blocks all those adult and explicit sites which could capture your child’s fantasy and distract them from studies. This tool will help you in monitoring your family’s online activity and prevent your child from distracting his mind. This tool will install as a tab on your web browser and hence with one simple click, you can turn on Child lock.
When you run the installation file of this tool, you will be asked to enter a password. Actually this is the password which you will be require to enter if you want to unlock the child mode and switch to parental mode. I will tell about both modes later. So in first box, enter any password and repeat same for second box. Third box is basically the question which you want this tool to ask, when you want to switch to parental mode.

Now in the next step you are required to enter your e-mail address so that if in case you forget your Parental Mode password, this tool will send you mail about your password and hence you will be able to retrieve your password. But before entering your mail address, ensure that your children don’t knows it password or you have not saved it on your browser.

Once all the setup is complete, you will see a tab bar on your explorer as shown below.

This tool automatically open in parental mode. Parental mode means mode in which you have access to all web sites as you usually have. But if you want to turn on block feature for you child, you will just need to click on Parental Mode and then this will automatically change to Child Mode.

Now all explicit sites will be blocked. If in case your child tries to open any explicit site, he will get an error message that access to request site is denied. You can see below how this error message look like.

Only you have authority to enter your password and access the site but no other person open website without knowing the password. By default, this tool block many of web sites which you may find not at all harmful for your child. For example it blocks search engine Google because from here anyone can search even for adult material.
So if you find any of your child’s necessity site being blocked by this tool, you can even all that site o safe list and give permission to allow that site to open in child mode. For adding any site to safe list, you will need to switch to parental mode and then open that particular site and then click on Add Site to Safe List present on tab bar and then again enter password to add that particular site to safe list.

You can even go to kid tracker to see which all are the sites open by your child. So in this way you can completely monitor your child.

The size of this tool is 4.75 Mb and it will itself get added in you internet browser when you install it. This tool is compatible with all the versions of Windows and has been tested successfully on Window 7 Ultimate –32 bit edition.
Download ParentalControl

New Radio Toolbar


